
Tomatoes are one of the most popular and versatile crops in Nigeria. They are used in various dishes, sauces, salads, and drinks. They are also rich in vitamins, minerals, antioxidants, and lycopene, a phytochemical that has many health benefits.
But growing tomatoes in Nigeria is not as easy as it may seem. Tomato farmers face many challenges, such as pests, diseases, weather, and market fluctuations. To succeed in tomato farming, you need to follow some best practices and tips that will help you produce high-quality and high-yield tomatoes.
In this blog post, I will share with you 13 ultimate tips for tomato farming in Nigeria, from choosing the right seeds, to preparing the land, to harvesting and marketing your tomatoes.
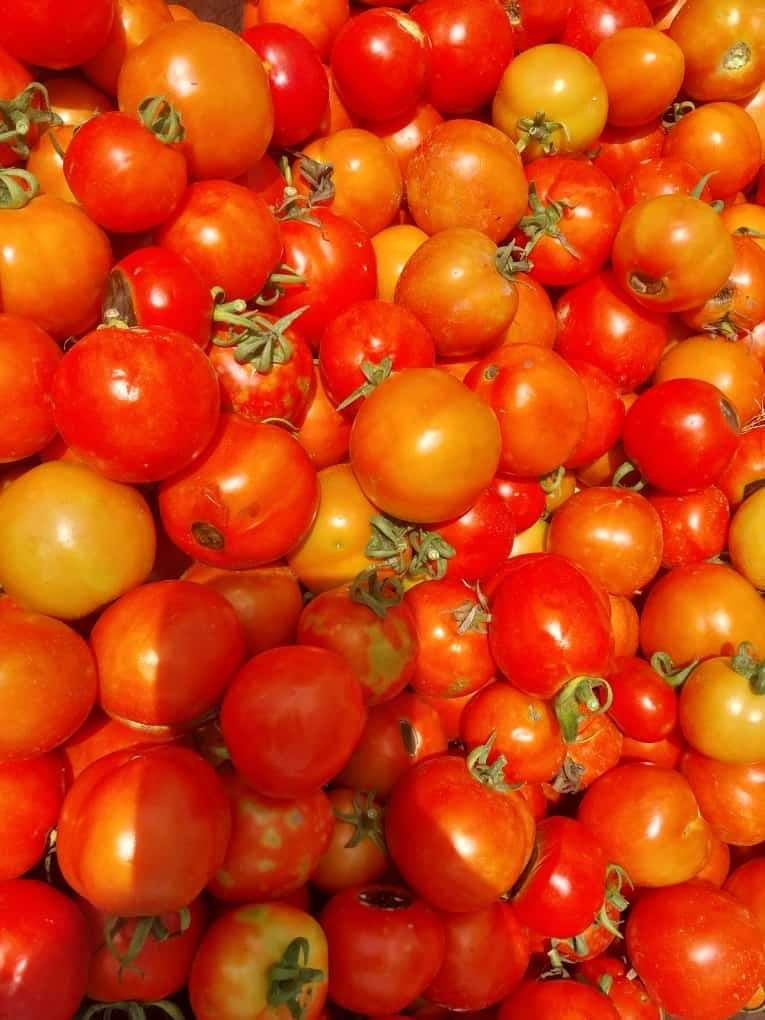
Table of Contents
Types of Tomatoes
Tip #1: Procure Quality Seeds
Tip #2: Prepare the Nursery
Tip #3: Sow and Raise the Seedlings
Tip #4: Select and Prepare the Site
Tip #5: Transplant the Seedlings
Tip #6: Water and Mulch the Plants
Tip #7: Fertilize and Prune the Plants
Tip #8: Control Pests and Diseases
Tip #9: Harvest the Tomatoes
Tip #10: Store and Process the Tomatoes
Tip #11: Market and Sell the Tomatoes
Tip #12: Keep Records and Evaluate Your Performance
Tip #13: Learn and Improve
Conclusion
Types of Tomatoes
There are two main types of tomatoes: determinate and indeterminate.
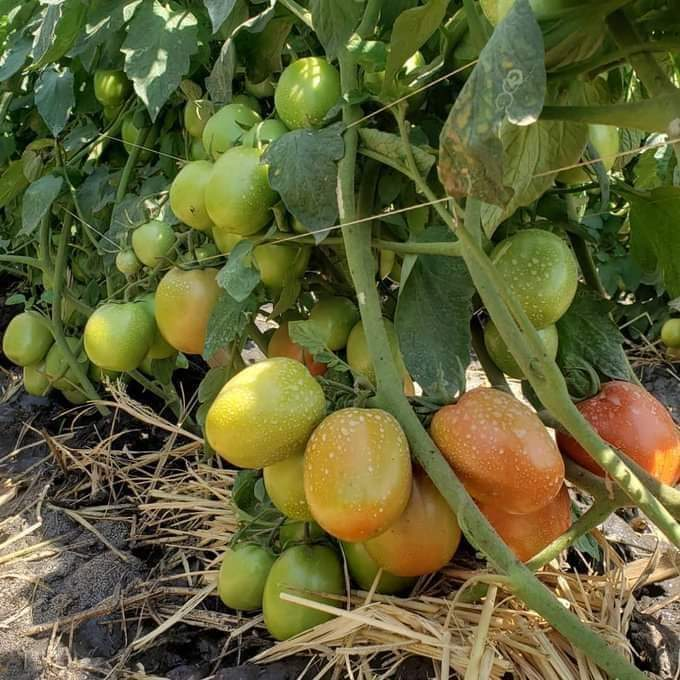
Determinate tomatoes are also known as bush or dwarf tomatoes. They grow to a certain height and produce ripe fruits at once for a short period. They do not need staking or caging. They are good for containers and small spaces. They are suitable for paste tomatoes, canning, and sauce making.
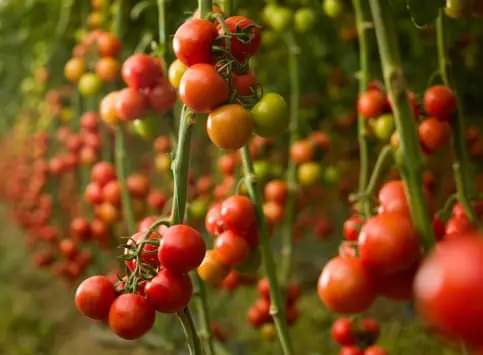
Indeterminate tomatoes are also known as vining or climbing tomatoes. They grow indefinitely and produce fruits throughout the season. They need staking or caging to support their growth. They are good for large gardens and greenhouses. They are suitable for fresh eating, salads, and slicing.
Some of the popular varieties of tomatoes in Nigeria are:
Platinum F1: A hybrid variety that produces large, firm, and red fruits. It is resistant to many diseases and pests. It has a high yield potential and a long shelf life.
Maxim F1: A hybrid variety that produces medium-sized, round, and red fruits. It is tolerant to heat and drought. It has a good flavor and a high yield potential.
Cobra 26 F1: A hybrid variety that produces small, oval, and red fruits. It is resistant to bacterial wilt and nematodes. It has a high yield potential and a long shelf life.
Rio-Grande: An open-pollinated variety that produces medium-sized, pear-shaped, and red fruits. It is tolerant to heat and drought. It has a good flavor and a moderate yield potential.
Tip #1: Procure Quality Seeds
One of the most important decisions you need to make as a tomato farmer is choosing the right seeds to plant. The quality of your seeds will determine the quality and quantity of your tomatoes.
You can buy seeds from reputable seed companies or agro-dealers, or you can save seeds from your own plants or from other farmers. However, if you save seeds, make sure they are from healthy and productive plants, and that they are properly cleaned, dried, and stored.
When buying seeds, look for the following characteristics:
- High germination rate
- High purity and viability
- Resistance or tolerance to pests and diseases
- Adaptability to your climate and soil conditions
- Suitability to your purpose and market preference
Tip #2: Prepare the Nursery
The next step in tomato farming is to prepare the nursery where you will sow the seeds and raise the seedlings. The nursery is where the seeds will germinate and grow into young plants that are ready to be transplanted to the main field.
You can choose to raise the nursery on beds in the garden or in containers indoors. The advantages of using containers are that you can control the temperature, moisture, and light better, and that you can avoid soil-borne diseases and pests.
The advantages of using beds are that you can save space, time, and money, and that you can acclimatize the seedlings to the outdoor environment better.
Whichever method you choose, make sure you follow these guidelines:
- Use a sterile and well-drained growing medium, such as cocopeat, compost, or soil mixed with sand and organic matter.
- Sow the seeds at a depth of 0.5 to 1 cm, and cover them lightly with the medium.
- Water the seeds gently and regularly, but do not overwater or underwater them.
- Keep the seeds in a warm and humid place, with a temperature of 25 to 30 degrees Celsius, and a relative humidity of 70 to 80 percent.
- Provide adequate light, either natural or artificial, for at least 12 hours a day.
- Protect the seeds from direct sunlight, wind, rain, frost, and pests.
Tip #3: Sow and Raise the Seedlings
The seeds will start to germinate in 5 to 10 days, depending on the variety and the conditions. Once the seeds sprout, you need to take care of the seedlings until they are ready to be transplanted.
Here are some tips for raising healthy and strong seedlings:
- Thin out the seedlings to avoid overcrowding and competition. Leave only one seedling per cell or pot, or space them at least 10 cm apart on the bed.
- Fertilize the seedlings with a balanced and diluted fertilizer, such as NPK 20:20:20, once a week. You can also use organic fertilizers, such as compost tea or fish emulsion, to boost the growth and health of the seedlings.
- Prune the seedlings to remove any diseased, damaged, or weak parts. You can also pinch off the tips of the main stem to encourage branching and bushiness.
- Harden the seedlings to prepare them for the transplanting. This means exposing them gradually to the outdoor conditions, such as sunlight, wind, and temperature, for a few hours a day, for a week or two before transplanting.
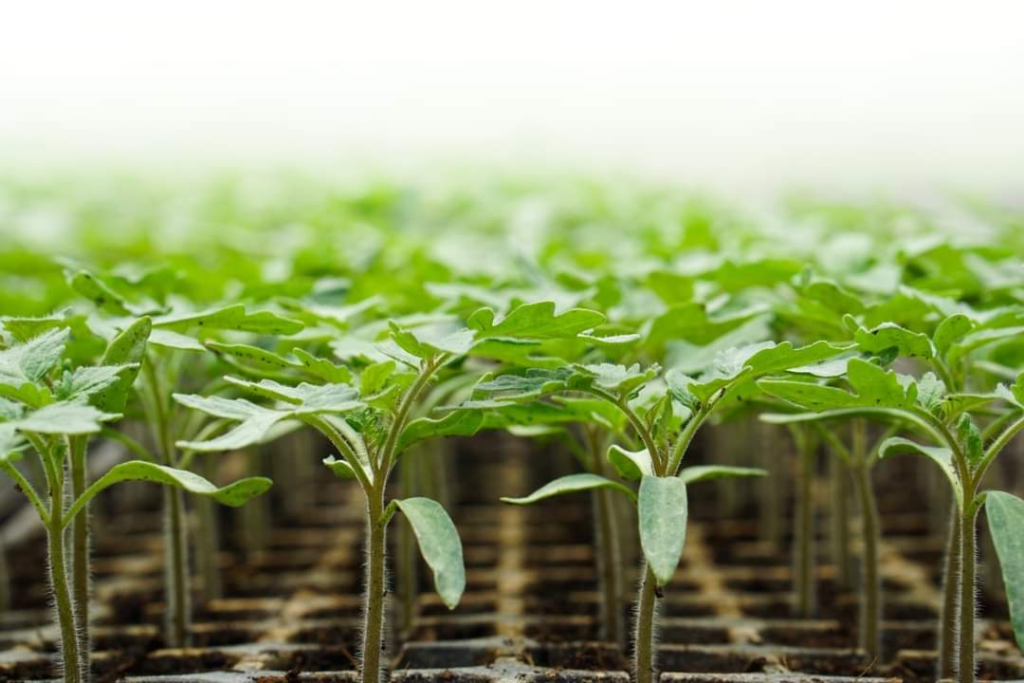
- The seedlings are ready to be transplanted when they have 4 to 6 true leaves, and are about 15 to 20 cm tall. This usually takes 4 to 6 weeks after sowing.

Tip #4: Select and Prepare the Site
The site where you will plant your tomatoes is another crucial factor that will affect your tomato farming success. You need to choose a site that is suitable for tomato growth and production, and prepare it well before transplanting.
Here are some factors to consider when selecting and preparing the site:
- The site should be sunny, as tomatoes need at least 6 hours of sunlight a day to produce well.
- The site should be well-drained, as tomatoes do not like waterlogged or soggy soils. You can improve the drainage by making raised beds, ridges, or furrows, or by adding organic matter or sand to the soil.
- The site should have a fertile and loamy soil, with a pH of 6.0 to 7.0. You can test the soil pH with a kit or a meter, and adjust it if needed. If the soil is too acidic, you can add lime or wood ash. If the soil is too alkaline, you can add sulfur or compost.
- The site should be free of weeds, pests, and diseases. You can clear the site of any vegetation, and apply pesticides or fungicides if necessary. You can also practice crop rotation, intercropping, or mulching to prevent or reduce the problems.
- The site should be enriched with organic matter and fertilizers. You can add farmyard manure, compost, or green manure to the soil, and mix it well. You can also apply chemical fertilizers, such as NPK 15:15:15, at the rate of 200 to 300 kg per hectare, and incorporate it into the soil.
- You should prepare the site at least 2 to 3 weeks before transplanting, to allow the soil to settle and the nutrients to become available.
Tip #5: Transplant the Seedlings
The next step in tomato farming is to transplant the seedlings from the nursery to the main field. This is a delicate and important process, as it can affect the survival and performance of the plants.
You should transplant the seedlings in the evening or on a cloudy day, to avoid exposing them to the harsh sun. You should also water the seedlings thoroughly before transplanting, to make the roots easier to remove and prevent them from drying out.
Dig holes in the prepared site, about 30 to 60 cm apart, depending on the variety and the spacing you prefer. The holes should be deep enough to bury the seedlings up to their first true leaves, as this will encourage more roots to develop and make the plants stronger.
Carefully remove the seedlings from their pots or cells, holding them by the leaves and not by the stems. Try not to disturb the roots too much, and avoid breaking or tearing them.
Place the seedlings in the holes, and fill them with soil. Press the soil gently around the stems, and make sure they are upright and firm.
Water the transplanted seedlings well, and add some mulch around them to conserve moisture and prevent weeds.
Tip #6: Water and Mulch the Plants
Watering and mulching are essential for tomato farming, as they help the plants grow healthy and productive.
Water the plants regularly and deeply, especially during hot and dry weather. Tomatoes need about 1 to 2 inches of water per week, depending on the soil type and the weather. You can use a drip irrigation system, a sprinkler, or a hose to water the plants, but avoid wetting the leaves, as this can cause fungal diseases.
Mulch the plants with organic materials, such as straw, grass clippings, leaves, or wood chips, to retain soil moisture, suppress weeds, moderate soil temperature, and add nutrients. You can apply mulch after transplanting, or after the plants have established and flowered. You can also use black plastic mulch to warm up the soil and prevent diseases.
Tip #7: Fertilize and Prune the Plants
Fertilizing and pruning are also important for tomato farming, as they help the plants grow vigorous and productive.
Fertilize the plants with a balanced and complete fertilizer, such as NPK 10:10:10, every 2 to 4 weeks, depending on the soil fertility and the plant growth. You can also use organic fertilizers, such as compost, manure, or fish emulsion, to supplement the chemical fertilizers. You can apply fertilizer as a side dressing, a foliar spray, or a liquid feed, following the instructions on the label.
Prune the plants to remove any suckers, which are the shoots that grow between the main stem and the branches. Suckers can divert energy and nutrients from the main stem and reduce the fruit quality and quantity. You can also prune the lower leaves to improve air circulation and prevent diseases. You can use your fingers or a sharp knife to prune the plants, and do it when the plants are dry and the weather is sunny.
Tip #8: Control Pests and Diseases
Pests and diseases are the major challenges of tomato farming, as they can damage the plants and the fruits, and reduce the yield and quality.
Some of the common pests and diseases that affect tomatoes are:
Aphids: These are small, soft-bodied insects that suck the sap from the leaves and stems, and cause curling, yellowing, and wilting. They can also transmit viral diseases. You can control aphids by spraying them with insecticidal soap, neem oil, or pyrethrum, or by releasing natural enemies, such as ladybugs, lacewings, or parasitic wasps.
Whiteflies: These are tiny, white-winged insects that suck the sap from the leaves and stems, and cause yellowing, stunting, and wilting. They can also excrete honeydew, which attracts ants and sooty mold. You can control whiteflies by spraying them with insecticidal soap, neem oil, or pyrethrum, or by using sticky traps, or by releasing natural enemies, such as lacewings, or parasitic wasps.
Tomato hornworms: These are large, green caterpillars with a horn-like projection on their tail, that feed on the leaves and fruits, and cause defoliation and fruit damage. You can control tomato hornworms by hand-picking them and dropping them in a bucket of soapy water, or by spraying them with Bacillus thuringiensis (Bt), a natural bacterium that kills caterpillars, or by releasing natural enemies, such as braconid wasps, which lay eggs on the caterpillars and kill them.
Early blight: This is a fungal disease that causes brown spots with concentric rings on the leaves and stems, and can also affect the fruits. It can spread rapidly and cause leaf drop and fruit rot. You can control early blight by removing and destroying the infected plants and fruits, by applying fungicides, such as copper or sulfur, or by using resistant varieties.
Late blight: This is a fungal disease that causes dark, water-soaked spots on the leaves and stems, and can also affect the fruits. It can spread rapidly and cause plant death and fruit rot. You can control late blight by removing and destroying the infected plants and fruits, by applying fungicides, such as copper or chlorothalonil, or by using resistant varieties.
Tip #9: Harvest the Tomatoes
Harvesting is the most rewarding part of tomato farming, as you get to enjoy the fruits of your labour.
Here are some tips for harvesting tomatoes:
- Harvest the tomatoes when they are fully ripe, which means they have reached their full colour and size, and are firm and juicy. You can also harvest them when they are slightly underripe, which means they have started to change colour, but are still hard and sour. You can then ripen them indoors, away from direct sunlight, at room temperature.
- Harvest the tomatoes by cutting them from the vine with a sharp knife or scissors, leaving a short stem attached. Do not pull or twist them, as this can damage the plant and the fruit.
- Harvest the tomatoes in the morning or evening, when the temperature is cooler, and avoid harvesting them when they are wet, as this can cause them to spoil faster.
- Harvest the tomatoes regularly, as this will encourage the plant to produce more fruits, and prevent overloading and cracking. You can expect to harvest tomatoes for 2 to 3 months, depending on the variety and the weather.
Tip #10: Store and Process the Tomatoes
After harvesting, you need to store and process the tomatoes properly to preserve their freshness and quality, and to prevent spoilage and waste.
Here are some tips for storing and processing tomatoes:
- Store the tomatoes at room temperature, away from direct sunlight and moisture. Do not refrigerate them, as this will ruin their flavour and texture. Tomatoes can last for a few days to a week at room temperature, depending on their ripeness and variety.
- Process the tomatoes as soon as possible, if you want to extend their shelf life and use them for different purposes. You can dry, can, freeze, or pickle the tomatoes, depending on your preference and equipment. Processing the tomatoes will also help you add value and diversify your products.
- Drying the tomatoes is a simple and natural way to preserve them. You can use a dehydrator, an oven, or the sun to dry the tomatoes, after slicing them and seasoning them with salt, herbs, or spices. Dried tomatoes can be stored in airtight containers for up to a year, and can be used for salads, soups, sauces, and more.
- Canning the tomatoes is a popular and safe way to preserve them. You can use a pressure canner or a water bath canner to can the tomatoes, after peeling, coring, and chopping them. You can also add lemon juice, salt, sugar, vinegar, or spices to enhance the flavour and acidity of the tomatoes. Canned tomatoes can be stored in a cool and dark place for up to 18 months, and can be used for stews, curries, casseroles, and more.
- Freezing the tomatoes is an easy and convenient way to preserve them. You can use a freezer bag or a container to freeze the tomatoes, after washing, drying, and cutting them. You can also blanch, peel, and core the tomatoes before freezing, if you prefer. Frozen tomatoes can be stored in the freezer for up to a year, and can be used for soups, sauces, salsas, and more.
- Pickling the tomatoes is a fun and flavourful way to preserve them. You can use a jar or a crock to pickle the tomatoes, after washing, trimming, and slicing them. You can also add garlic, onion, dill, mustard, or other spices to create different flavours of pickles. Pickled tomatoes can be stored in the refrigerator for up to a month, or in a cool and dark place for up to a year, and can be used for sandwiches, salads, snacks, and more.
Tip #11: Market and Sell the Tomatoes
Marketing and selling the tomatoes is the final and most rewarding step of tomato farming, as you get to earn income and satisfy your customers.
Here are some tips for marketing and selling tomatoes:
- Identify your target market and customer segments, and understand their needs, preferences, and expectations. You can conduct market research, surveys, or interviews to gather information and feedback from your potential customers. You can also study your competitors and learn from their strengths and weaknesses.
- Develop your unique selling proposition and brand identity, and communicate them clearly and consistently to your customers. You can highlight what makes your tomatoes different and better than others, such as your quality, variety, flavour, freshness, or origin. You can also create a catchy name, logo, slogan, or story for your tomatoes, and use them on your packaging, labels, or signs.
- Choose the best channels and platforms to promote and sell your tomatoes, and reach your customers effectively and efficiently. You can use online or offline methods, or a combination of both, depending on your budget, resources, and goals. Some of the common channels and platforms are:
- Online: You can use a website, social media, email, or online marketplace to showcase and sell your tomatoes, and interact with your customers. You can also use online advertising, SEO, or influencer marketing to increase your visibility and traffic.
- Offline: You can use a farmers’ market, roadside stand, grocery store, or restaurant to display and sell your tomatoes, and engage with your customers. You can also use flyers, posters, banners, or word-of-mouth to spread the word and attract customers.
4. Offer high-quality products, fair prices, and excellent service to your customers, and build trust and loyalty with them. You can also offer discounts, coupons, samples, or freebies to entice and reward your customers. You can also ask for feedback, testimonials, or referrals from your customers, and use them to improve your products and marketing.

Tip #12: Keep Records and Evaluate Your Performance
Keeping records and evaluating your performance are essential for tomato farming, as they help you track your progress and identify your strengths and weaknesses.
Here are some tips for keeping records and evaluating your performance:
- Keep records of your inputs, outputs, and activities, such as the seeds, fertilizers, pesticides, water, labor, equipment, land, harvest, sales, expenses, and profits. You can use a notebook, a spreadsheet, or a software to record and organize your data.
- Analyze your records and calculate your key indicators, such as the yield per hectare, the cost of production, the return on investment, the break-even point, and the profit margin. You can use formulas, charts, or graphs to visualize and compare your results.
- Evaluate your performance and identify your areas of improvement, such as the quality, quantity, and consistency of your tomatoes, the efficiency and effectiveness of your methods, the satisfaction and loyalty of your customers, and the sustainability and profitability of your business.
- Set your goals and objectives for the next season, based on your evaluation and feedback. You can use the SMART criteria (Specific, Measurable, Achievable, Relevant, and Time-bound) to make your goals clear and realistic.
Tip #13: Learn and Improve
Learning and improving are the keys to tomato farming success, as they help you adapt to the changing conditions and demands, and stay ahead of the competition.
Here are some tips for learning and improving:
- Learn from your own experience and mistakes, and apply the lessons learned to your future actions. You can also learn from other tomato farmers, experts, or mentors, and seek their advice and guidance.
- Improve your skills and knowledge, and keep yourself updated on the latest trends and innovations in tomato farming. You can also improve your products and services, and offer new and better solutions to your customers.
- Experiment with new ideas and methods, and test their effectiveness and feasibility. You can also experiment with new varieties and markets, and explore new opportunities and niches.
- Seek feedback and suggestions from your customers, partners, and stakeholders, and listen to their needs, preferences, and expectations. You can also seek feedback and suggestions from your peers, colleagues, and friends, and learn from their perspectives and insights.
Conclusion
Tomato farming is a rewarding and profitable business that can transform your life and livelihood. By following the 13 tips outlined in this blog post, you can grow tomatoes in Nigeria and reap the benefits of this booming industry. Whether you want to grow tomatoes for personal consumption, or for commercial purposes, you can find a market and a customer base for your tomatoes.
You can also leave a comment below and share your thoughts or questions on this topic.